Have you ever noticed the term “IoT Hidden Menu” on Android? Here we have a detailed guide about IoT hidden menu on android. What is it and how to access it on your Android smartphone. Also, we shall explore the uses of IoT hidden menu on your phone.
Android phones come with lots of features and functions. Some of the features on Android are hardware-based while others are software-based.
But, today we gonna discuss a new IoT hidden menu on Android which is both software and hardware-based menu.
What is IoT Hidden Menu Setting?
The IoT hidden menu on Android phones is a software-oriented menu on Andriod that helps you to diagnose the associated hardware and the functional error of the hardware like camera, wifi, Bluetooth, radio services, touch screen sensors, Proximity Sensor, Accelerometer and many more.
This IoT hidden menu is not accessible to the user in the apps section or the settings.
The only method to access the menu is to key-in the combination of special secret codes called MMI codes on the dialer.
Well, there are seamless features and functions you will find on this hidden IoT menu on Android.
Read Also:
List of Samsung Secret Codes | Samsung One UI and TouchWiz Devices
How to Access IoT Hidden Menu on Android?
IoT Hidden Menu is just like easter eggs, you don’t find it easily. To access this menu, you need to have some special codes just like dialing the *06# shows you the IMEI number of your phone.
To access the IoT menu on Android Samsung, you need to open the dialer app type *#0*# and press dial. And for other Android brands, you can use *#*#4636#*#* to access the hidden IoT menu.
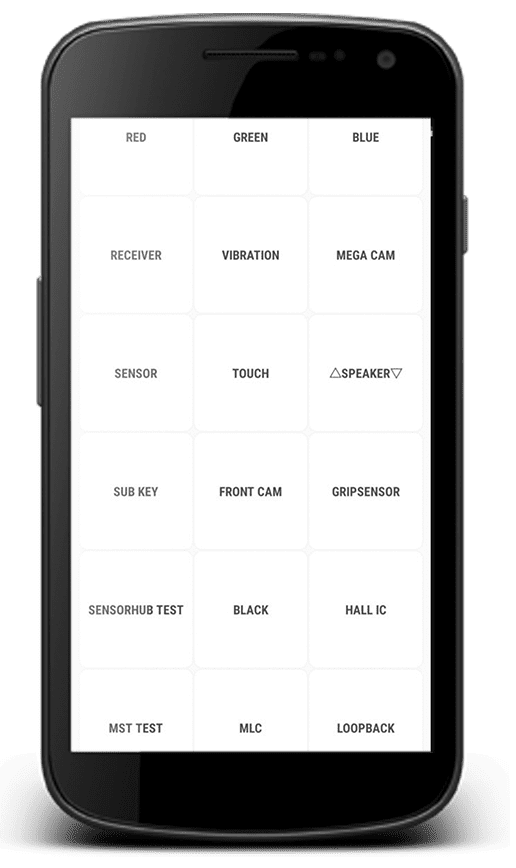
Feature of IoT Menu
The IoT hidden menu also known as the service menu is used to diagnose the hardware and component on the Android phone to check the function of the different components on the device.
Here is the list of a few sensors and components you can test and diagnose for the error using an IoT menu.
1. Accelerometer
The accelerometer is a major component on Android phones accountable for the measurement of the orientation and acceleration of movement of the phone. The sensor assists your Android phone to change the orientation of the device.

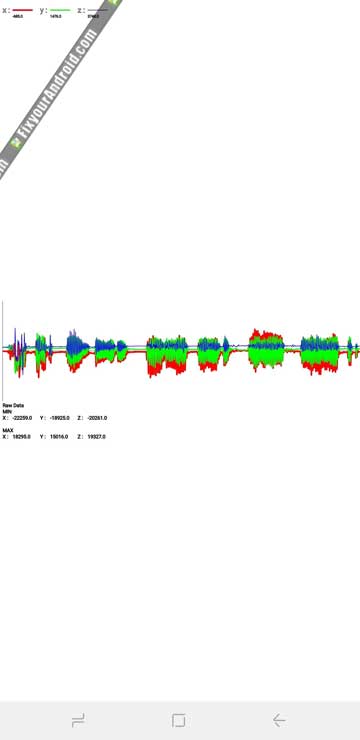
To check the functionality of the Accelerometer on your Android from IoT menu, just tap on the “Image Test” or “Graph” button to measure how perfectly the sensors detect the motion and movement of the phone.
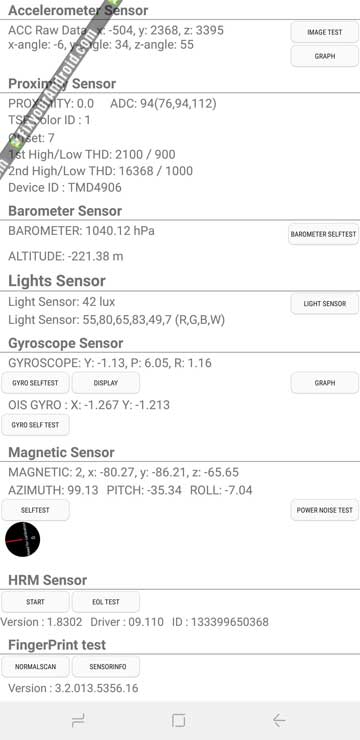
2. Proximity Sensor
The proximity sensor on your android phone is responsible to test if the screen on your phone gets off while you hold it near your ear to answer the calls.
You can simply test the proximity sensor by covering the sensor near your format camera to check if the screen goes off or not.
To test the IoT menu’s proximity sensor, just cover the sensor and see if the screen turns green. removing the hand from the sensor should turn the screen back to white. This is the sign of a perfectly working proximity sensor.
3. Barometer
The barometer is used to measure the different features on your android device.
It is accountable for the measurement of altitude to make GPS tracking more prominent and accurate.
A malfunctioning Barometer may reflect the wrong data.
To test the barometer using the IoT menu all you need is to tap on the “Barometer Selftest” to start the automated test.
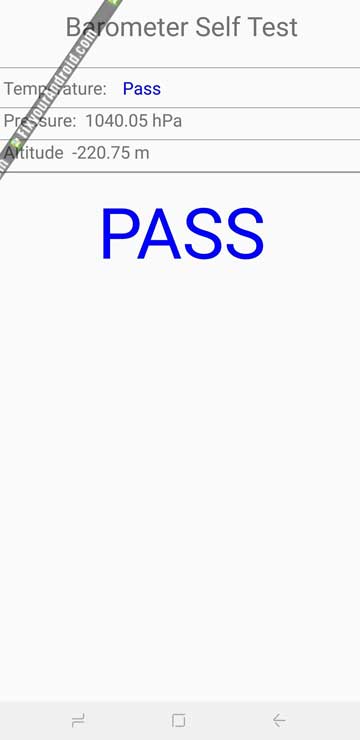
A simple “PASS” screen will confirm the normal functionality of Barometer.
4. Light Sensor
IoT menu can also help you to test the light sensors on your Android phone. A light sensor is typically sensitive to the intensity of light the device is exposed to.
The adaptive light controls the light luminosity and brightness of the screen.
To test the light sensors on the IoT menu, tap on the “Light Sensor” to initiate the test, then expose your phone to the light of varying brightness.
Three levels should register in turn, starting from “Level 1” for dim lighting all the way up to “Level 3” for extremely bright.
5. Iris Camera Test
As the name suggests the Iris camera is responsible to help you to unlock the phone using a facial recognization system. A malfunction on the iris camera can keep you from using the face unlock feature on your android phone.
On the IoT menu, tap on the “Iris Camera Test” to check if it’s working perfectly.
Tapping on the button pulls up your iris camera for you to align your eyes with, and will instantly close and go back to the main diagnostic page once it’s successfully scanned your iris.
6. LED & Low Frequency
Have you noticed the notification light on the corner of your Android phone? You can actually use the IoT menu to test the LED notification light and it’s frequency as well.
Simply tap on the “LED” button on IoT menu and change the colors of the notification LED by touching the respecting color strips on the screen.
The “Low Frequency” is actually used to test the sound frequency of the earpiece of the phone. The “Low Frequency Test” reflects the sound at different frequencies to test the earpiece speakers.
Tap on 100 Hz, 200 Hz, and 300 Hz and place your ear against the phone’s earpiece each time you select a frequency to check for low buzzing noise.
7. Grip sensor
This is a new future sensor introduced to Samsung phones. If your Android is having a grip-sensor installed. You can simply test the sensor from IoT menu.
To test this functionality, tap on the “Gripsensor” button, then follow the prompts and release your grip when instructed.
You should get a blue screen labeled “Working” if the grip sensor is functioning properly. Once you’re done with the test, tap on the back button twice to go back to the main screen.
Other Features of IoT Hidden Menu
Besides the above-mentioned feature, there are lots of other features you can test using the IoT menu on your Android phone.
| S. No. | Feature | Fuctions |
|---|---|---|
| 1 | Red, Green & Blue Screens | Test the color intensity and true color tone on display. |
| 2 | Receiver & Vibration | Audible tones and vibrator test |
| 3 | Dimming | Test dimming and brightening of the screen |
| 4 | Mega Cam Sensor | Tap on "Mega Cam" to test out your main camera. |
| 5 | Magnetic Sensor | Test the magnetic functionally of the phone. Tap on "Power Noise Test," or "Selftest" |
| 6 | HRM | This tests out your smartphone's heart rate monitor and can be performed in two ways. Tapping on the "Start" button within the "HRM" tab will take you to the "HRM Test" page, and from there you can test your handset's heart rate monitor by placing your finger on the sensor. |
| 7 | Fingerprint Sensor | Tap on "Normal Scan" to commence testing, which will take place automatically to check if all components are functioning properly. |
| 8 | Touch | Touch sensitivty test. |
| 9 | Sleep & Speaker | Test the device's sleep functionality and speaker output. |
| 10 | Sub Key | Test the hardware buttons including power, Volume and home button |
| 11 | Front Cam | Tap on the "Front Cam" button to test the functionality of front camera |
| 12 | Hall IC, MST & MLC Tests | Test to verify the magnetic fields sensor to detect the magnetic-based flip covers. This sensor is essential when using payment services such as Samsung Pay. |
| 13 | Iris Camera Test | The "Iris Camera Test" tests out the infrared iris camera that's used to unlock your device. |
How to Access IoT Hidden Menu Without Code?
Although, the majority of Android mobile phones have this secret IoT hidden menu that can be accessed by simply dialing *#*#4636#*#* on default dialer.
But, if the code doesn’t work, you can still unlock the System UI Turner using the steps below.
- Unlock your android.
- Open settings(gear icon).
- Open the System UI Tuner and click on OK or Got It
you can now customize your phone and display your phone battery on the screen. It also allows you to modify your Volume button and use it for Do Not Disturb.
What if the method doesn’t Work and I am still not able to access IoT Menu?
If the method explained above doesn’t seem to work. Here is the long method you need to follow to access the System UI Tuner or IoT Hidden Menu.
- Go to the Home Screen on Android.
- Long-press on an empty space.
- Select Shortcuts from the menu displayed and add them to the home screen.
- Select Pick Your Activity>Activities.
- Scroll down to see the Hidden Menu.
Different settings will be displayed when you tap on the menu on the screen. And you are free to carry on any task as you wish.
Other Secret Code to Access Hidden Menu Settings on Android
| Secret Code | Triggered Functions |
|---|---|
| *#06# | IMEI number of your smartphone |
| *#*#34971539#*#* | See the camera details |
| *#*#1111#*#* | FTA version details |
| *#*#4636#*#* | Check the information about the phone |
| *#12580*369# | Phone’s hardware and software information |
| *#*#232338#*#* | Device MAC Info |
| *#*#2663#*#* | Device Touch info |
| *#*#3264#*#* | Device RAM info |
| *#*#232337#*# | Device Bluetooth info |
| *#*#273282*255*663282*#*#* | To back up all of your files |
| *#*#1575#*#* | Testing GPS Device |
| *#*#232339#*#* | Test the Wi-Fi |
| *#*#0289#*#* | The the sounds output |
| *#*#0842#*#* | Vibration, and haptic feedback test |
| *#*#7594#*#* | Switching off the phone |
| *#9090# | Diagnose system |
| *#7780# | Reset your phone (FRP) |
| *#*#8351#*#* | Dialer log activation |
| #*#8350#*#* | Dialer log deactivation |
Exiting the IoT Menu
Once you are done with the required test, you can simply tap the back button twice to exit IoT Hiden menu and go back to the dialer. You are ok to operate the device normally.
Hope you have learned a new function of your Android device. Also, don’t forget to explore the additional futures.
Wrapping up:
IoT menu or the Service menu on Android has been from the start of the Android phone era. There are no stand-alone IoT menu apk or app but in order to access the menu, you need a special combination of shortcodes to dial. The menu is used to test the different features and functions on the phones that include, Accelerometer, Proximity Sensor, Barometer, Light Sensor, Iris Camera Test, LED & Low Frequency, Gripsensor etc. Don’t forget to check our ABOUT section for other information guides for Android